Quick Answers: The Best Airbrush for Miniatures
Start with a gravity-feed, dual-action airbrush with a 0.3–0.4 mm needle, and buy it together with a compressor you can regulate.
Each answer below stands on its own, so you can read the one that matches your situation and move on.
- Which type is best for miniatures? A gravity-feed, dual-action airbrush, because it sprays smoothly at low pressure and wastes very little paint.
- Which needle size should I start with? 0.3–0.4 mm covers most miniature work; add a 0.2 mm setup later for fine lines and a 0.5 mm setup for primer and large surfaces.
- Do I need a compressor with a tank? Not strictly, but a tank or an auto-stop compressor with a regulator holds pressure steadier and pulses less than the cheapest tankless units.
- What is the best budget route? A starter kit that bundles the brush and compressor, provided it includes a regulator and you can still buy spare needles and nozzles.
- Can one airbrush handle Warhammer armies? Yes for priming, basecoats and varnish; a second small-needle brush makes fine detail and character work easier.
- What should I check before paying? Spare-parts availability, the exact nozzle and needle sizes included, pressure control on the compressor, and how easily the brush strips down for cleaning.
What Makes an Airbrush Good for Miniatures
Control at low pressure matters more than the name on the box, because miniature paint is thin, the surfaces are small, and the difference between a smooth coat and a grainy one is usually airflow rather than the label.
Three design choices decide most of your results. The feed type sets how much pressure you need and how much paint you waste. The trigger action sets how precisely you can feather a highlight. The nozzle and needle size sets whether the brush lays down primer or pulls a fine line. Everything else — weight, cup size, thread standard, seal material — is a convenience or a maintenance question.
That is why most advice for small miniatures converges on the same shape: paint above the nozzle, one trigger that handles both air and paint, and a nozzle in the middle of the size range.
Check before buying: that the brush sprays at low pressure without spitting, that spare needles and nozzles exist for that exact model, and that the cup holds enough paint that you are not refilling every few models.
Gravity-Feed vs Siphon-Feed
Gravity-feed is the better default for miniatures. Siphon-feed is for volume, not for control.
A gravity-feed brush keeps the cup on top of the body, so paint falls into the nozzle with almost no help from the airflow. That lets you spray at lower pressure, which keeps thin acrylics from drying in the air and landing as grit on the model. You can also change colors by tipping a few drops out of the cup instead of flushing a bottle and a tube.
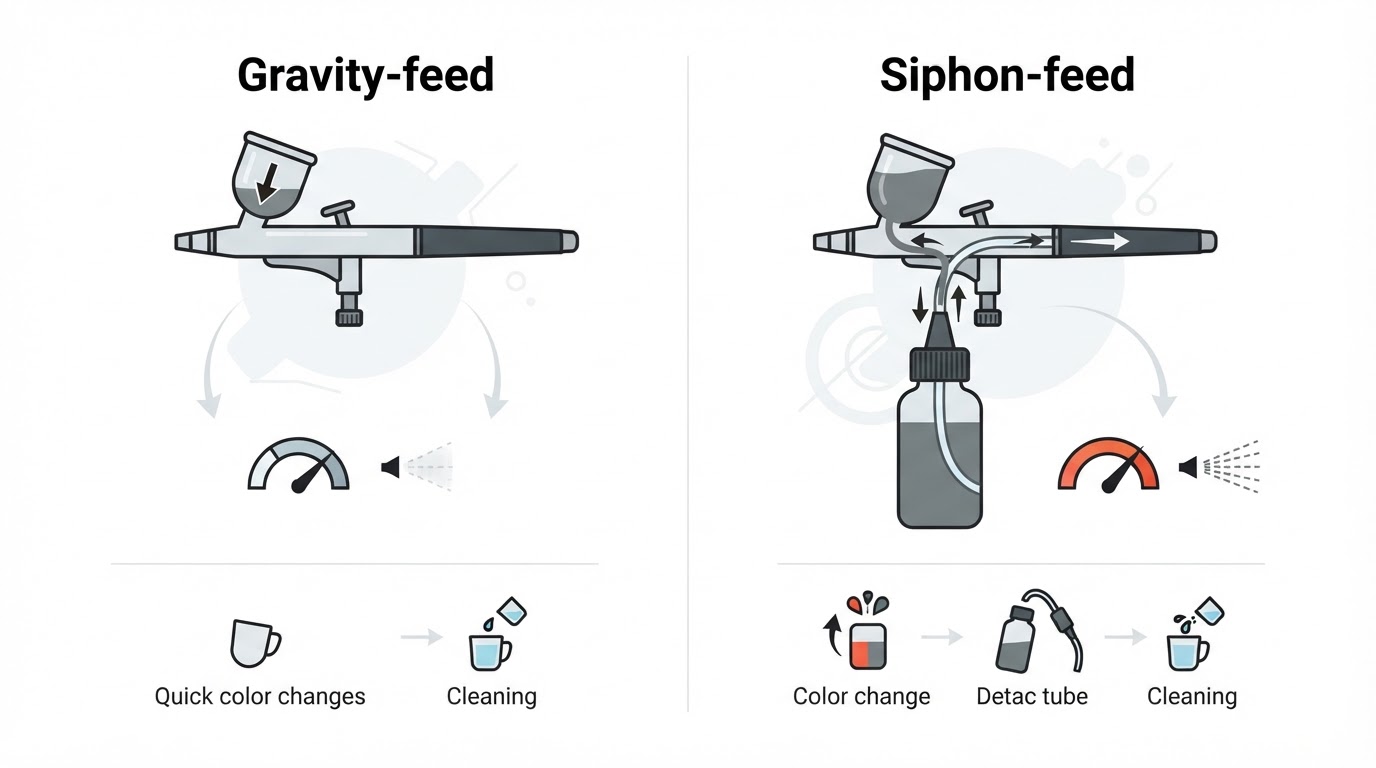
A siphon-feed brush pulls paint upward from a bottle or jar mounted below the body. It holds more paint and can be convenient when you are coating a lot of the same color, such as terrain or a large vehicle. The trade-offs are real: it needs more pressure to lift the paint, wastes more between colors, and takes longer to clean.
| Gravity-feed | Siphon-feed |
|---|---|---|
Paint path | Cup on top, paint falls into the nozzle | Bottle below, airflow lifts paint upward |
Pressure needed | Lower | Higher |
Color changes | Quick, little waste | Slower, more flushing |
Best for | Miniatures, detail, small volumes | Large batches, terrain, one color |
Dual-Action vs Single-Action
Choose dual-action for miniatures. A single-action brush is easier to learn on, but it runs out of control as soon as you want a fine line or a soft transition.
On a dual-action brush, pressing the trigger releases air and pulling it back adds paint, so you can keep air flowing while you feather paint on and off. That is the motion that zenithal priming, smooth blends and thin highlight passes depend on.
On a single-action brush, the trigger only releases air, and you set paint flow with a screw or a knob before you spray. It is simpler, and for flat coverage it can work well, but you cannot adjust paint while you are moving across a model.
Check before buying: that the trigger returns cleanly, that you can add air without adding paint, and that the needle seats without wobble when you reassemble the brush.
Needle and Nozzle Size
Treat needle size as your detail dial — 0.2 mm for fine lines and small details, 0.3–0.4 mm as the general-purpose range for infantry and vehicles, and 0.5 mm for primer, basecoats and large surfaces.
The needle and nozzle work as a matched pair, so change them as a set and never mix sizes. A smaller nozzle gives a tighter spray pattern, but it also needs thinner paint and finer trigger control. A larger nozzle is far more forgiving and much faster across a whole unit.
For a first brush, a 0.3–0.4 mm setup is the useful middle ground. It is tight enough for controlled detail on cloaks, armor panels and faces, and wide enough to prime and basecoat without taking all evening. If you later add a second brush or an interchangeable set, a 0.2 mm nozzle handles the fine work while a 0.5 mm nozzle turns primer and varnish into quick jobs.
Check before buying: whether the brush ships with one size or a set, whether spare needle-and-nozzle pairs are stocked, and whether the sizes you want share the same brush body.
Best Airbrush for Beginners
The best beginner airbrush is a gravity-feed, dual-action model with a 0.3–0.4 mm needle, a lid on the cup, and spare nozzles you can actually buy — paired with a compressor you can regulate.
Beginners get frustrated by the wrong things. A complicated brush with a tiny nozzle punishes every mistake in paint consistency, while a heavy siphon-feed kit makes cleaning a chore before the first miniature is finished. The middle of the range avoids both problems.
A sensible first kit has four things: a dual-action, gravity-feed brush; a nozzle and needle in the 0.3–0.4 mm range; a compressor with a regulator and a moisture trap; and either spare needles and nozzles in the box or a product page where you can buy them later.
You do not need the most expensive brush to learn. You need one you can strip, clean and reassemble without hunting for a tutorial, and one whose replacement parts stay available while you practice.
Check before buying: find the exact needle and nozzle size in the listing, look for a spare-parts section, and confirm the fittings on the brush match the hose on the compressor.
Best Setup With a Compressor
Buy the airbrush and the compressor as one system. The compressor decides whether your pressure holds steady, and steady pressure is what makes thin paint behave.
Two compressor designs dominate starter setups. A tank compressor fills a reservoir and switches on when pressure drops, so airflow stays even and the motor runs less often — the steadier and quieter choice for a desk in a shared room. A tankless compressor runs continuously while you spray; it is smaller and cheaper, but the airflow can pulse and the motor noise never stops.
Whichever you choose, three features matter more than the size of the unit: a regulator with a readable gauge, a moisture trap, and fittings that match your brush and hose. Without a regulator, you cannot repeat a result you liked yesterday.
Miniature work happens at low pressure, so check that the compressor can hold a low setting rather than only its maximum. A unit that is stable at low pressure will handle everything from a fine highlight pass to a primer coat.
Check before buying: the working pressure range, whether the gauge shows the pressure at the brush rather than only at the tank, the thread size on the outlet, and whether the hose and fittings are included.
Best Airbrush for Warhammer and Army Painting
For Warhammer armies and other batch painting, prioritize speed and reliability: a 0.4–0.5 mm gravity-feed brush with a regulator on the compressor will prime, basecoat and varnish a whole unit far faster than a hand brush.
The army workflow is repetitive by design. Prime a squad, basecoat the dominant color, add a zenithal pass to catch the light, then switch to a hand brush for details before a final varnish. An airbrush earns its place in the first three steps, and it is the reason a unit can move from bare plastic to table-ready without a week of evenings.
A 0.4–0.5 mm needle is the practical choice here: it moves enough paint for coverage and tolerates slightly heavier mixes. Keep a smaller brush or an interchangeable 0.2 mm setup for character models, cloaks and any work where overspray would ruin a neighboring area.
Two habits make army painting easier. Batch the same color across every model before you change paint, and mask or shield the parts you have already finished. Both reduce how often you have to strip and clean the brush in an evening.
Check before buying: that the cup is large enough for a squad's worth of paint, that the brush can be cleaned quickly between colors, and that the compressor can run for long sessions without overheating or losing pressure.
Budget Options: Where to Save
Save on the compressor and the brand name; never save on spare needles, nozzles and a regulator.
Budget kits usually cut costs in the same places: no regulator or gauge, a continuously running motor, plastic-bodied fittings, a single nozzle with no spare, and a hose that fits only that kit. Some of those compromises are acceptable for a first brush. Others will cost you more time than they save.
A budget kit is genuinely fine for priming, basecoats, varnishing, terrain and learning how paint consistency behaves. It becomes frustrating when you chase fine detail, thin lines, or any job where pulsing airflow shows up as a blotchy coat.
If you are buying at the low end, look for the boring parts rather than the accessories. A regulator with a gauge, a moisture trap, a standard thread on the compressor outlet, and a replacement needle and nozzle in the same listing are worth more than a case full of tools you will never use.
Check before buying: whether the nozzle size is stated as a number, whether spare parts are listed, and whether the fittings are standard rather than proprietary.
The Pre-Purchase Checklist
Run through these checks before you pay, because almost every disappointing starter kit fails one of them.
- Gravity-feed cup with a lid or a generous capacity.
- Dual-action trigger.
- A stated nozzle and needle size, ideally 0.3–0.4 mm.
- Spare needle and nozzle available, in the box or in stock.
- Regulator with a gauge and a moisture trap.
- Tank or auto-stop compressor rather than a continuously running motor.
- Standard hose and fittings that match between brush and compressor.
- A return window long enough to test the setup on paper.
Getting a Clean First Coat
Thin the paint, lower the pressure, and build the coat in light passes — that combination prevents most beginner problems before they start.
Mix the paint thinner than you think you need and test it on paper. If the spray looks like a fine mist and dries flat, the mix is close. If it sputters, the paint is too thick or the pressure is too low; if it runs, the mix is too thin or you are holding the brush too close.
Spray a test pattern on paper before you point the brush at a model. Trigger the air on, then the paint on, and release the paint before the air — that habit stops a blob from forming every time you start and stop. Keep the brush moving in overlapping passes rather than parking it in one spot, and clean the nozzle between colors instead of pushing dried paint through it.
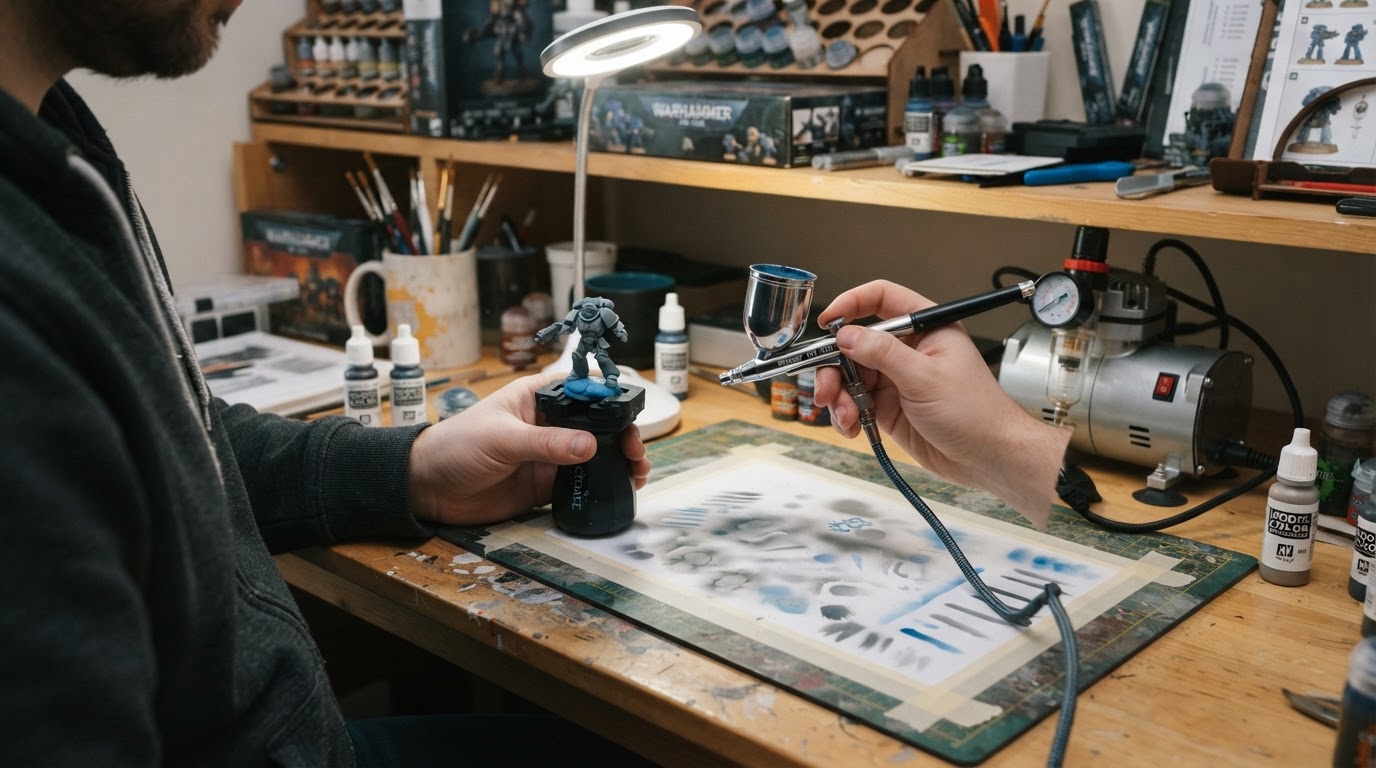
Work in thin layers and let each one dry before adding the next. Two or three light passes give a smoother finish than one heavy pass, and they make mistakes easier to correct.
FAQ
Do I need a compressor with a tank?
No, but a tank makes steady pressure easier. A tank or auto-stop compressor switches off while you spray, so airflow pulses less and the noise stops between sessions. A tankless unit works and takes less desk space; just check that it holds a stable low pressure and does not overheat during long sessions.
What needle size should a beginner start with?
0.3–0.4 mm. It is wide enough to prime and basecoat without perfect paint mixing, and tight enough for controlled detail once your mixing is consistent. Add a 0.2 mm needle later for fine work and a 0.5 mm needle for primer and large surfaces.
Can one airbrush handle both priming and detail?
Yes, with a compromise. A 0.3–0.4 mm brush covers both jobs reasonably, but a dedicated 0.5 mm setup makes priming much faster and a 0.2 mm setup makes fine lines much easier. Many painters start with one brush and add a second once they know which half of the hobby they spend more time on.
Is a budget starter kit worth it?
Often yes, as long as it includes a regulator, states its nozzle size, and has spare needles and nozzles you can buy later. Budget kits are a fair way to learn priming, basecoats and varnishing. They become frustrating when you chase fine detail or fight an unsteady airflow.
Do I need a spray booth and a respirator?
Yes. Airbrushing turns paint into a fine aerosol, so spray in a ventilated space or a booth with extraction, and wear a suitable mask rather than relying on an open window. This is a decision worth making before your first session, not after.
Why does my airbrush sputter or spray unevenly?
Usually because the paint is too thick, the pressure is too low, or dried paint is blocking the nozzle. Thin the mix, raise the pressure slightly, and clean the nozzle and needle before changing anything else. If the problem continues, check that the needle is seated correctly and that the nozzle is not damaged.
What else should I check before buying?
Spare-parts availability, the exact needle and nozzle sizes included, pressure control and moisture removal on the compressor, and how easily the brush strips down for cleaning. Those four answers tell you more about a setup than any marketing claim on the box.