The short answers
- Which wet palette should a beginner buy first? The Masterson Sta-Wet Handy Palette. It is the no-fuss sponge-and-paper tray that beginner discussions keep coming back to.
- When is a Redgrass-style palette the better buy? When you paint often or in long sittings and want tighter moisture control in a sturdier, better-sealed tray.
- Should you jump straight to the XL? Only if you paint several figures, vehicles, or terrain pieces at once and have the desk space for a big open tray.
- What is the Lite version for? Smaller desks, travel, and short sessions, where a compact, lighter tray matters more than mixing area.
- Can you make a wet palette yourself? Yes. A shallow airtight container, a clean sponge, and parchment or baking paper will get you a workable DIY version.
- Wet palette or dry palette? Wet for blending and keeping mixed colors alive; dry when you want paint to sit exactly where you put it and dry on your schedule.
- Is a wet palette worth it? For acrylic painters, usually yes: it slows drying, so you waste less paint and stop re-mixing the same shade.
What a wet palette actually does
A wet palette is a shallow tray, a damp sponge or membrane, and a porous paper or membrane sheet on top. Water moves up through the sheet slowly, so the paint sitting on it stays workable for hours instead of minutes.
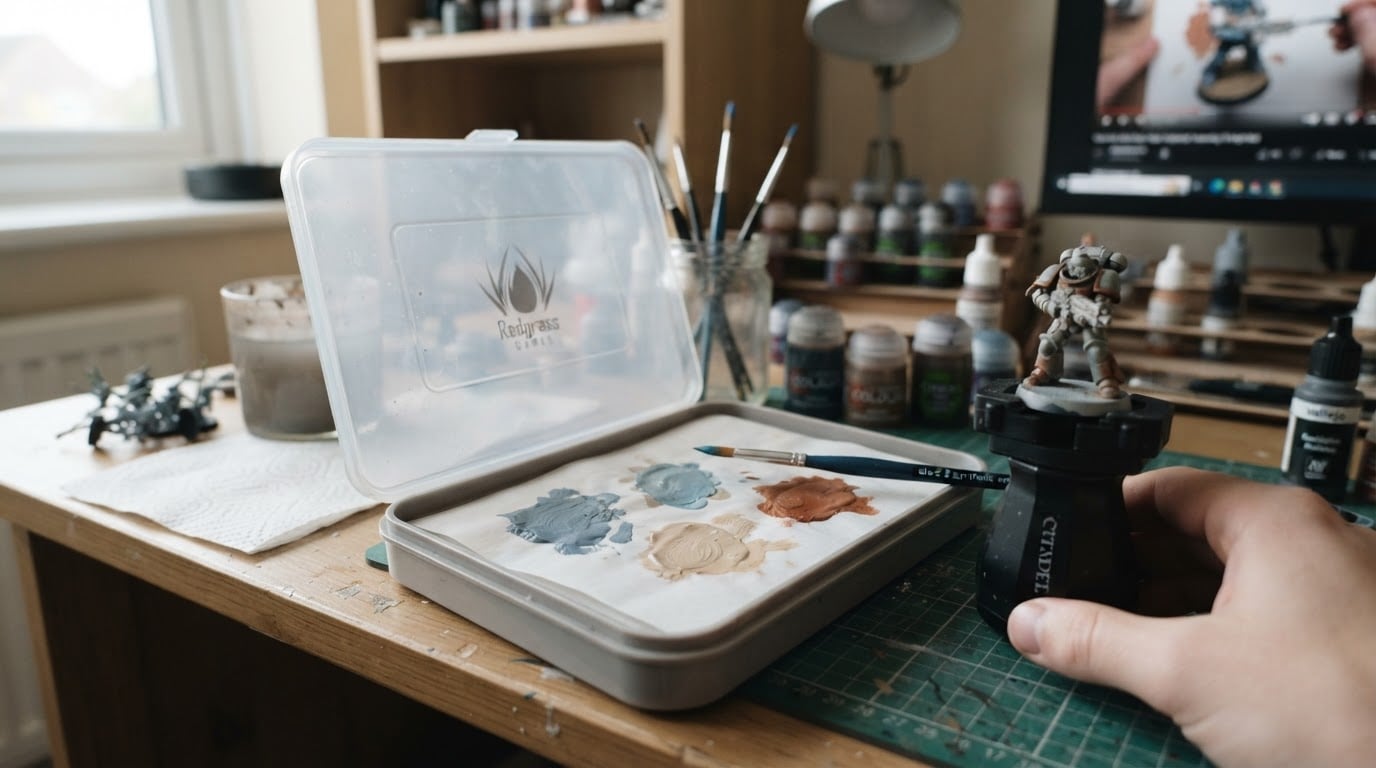
Three things change once paint is on a wet palette:
- Drying slows down. You can leave a mixed color while you paint another area and come back to it while it is still usable.
- Thinning happens gradually. Paint pulls a little water from below, which helps you reach a smooth, flowing consistency without adding water to the mix yourself.
- Blending gets easier. Because the paint stays open, you can soften the join between two colors on the palette or straight on the model.
What a wet palette does not do is rescue a bad mix. It keeps paint usable; it does not make watery paint cover, and it will not bring back paint you already let dry. Close the lid when you stop, and expect to replace the paper regularly.
The default pick: the Masterson Sta-Wet Handy Palette
For most people buying their first wet palette, the Masterson Sta-Wet Handy Palette is the pick to start with. It is a simple sponge-and-paper tray with a lid, and it does the one job a beginner needs: keeping mixed acrylics usable through a painting session.
Why it wins for beginners:
- Nothing to configure. Sponge in, paper on, water, paint. There is no setup routine to learn before you can start.
- Parts are easy to replace. Refill paper and sponges for this style of tray are easy to look for at hobby shops and online retailers, so check that they are in stock where you buy.
- Forgiving with basic gear. It keeps paint moving, so you can spend your first sessions learning brush control instead of fighting drying paint.
What to check before buying: the current price and what is in the box, whether refill paper is easy to get where you live, and the tray footprint against your desk. Prices and bundles change, so compare the listing you are actually buying from rather than a review from an earlier year.
When a Redgrass-style palette earns its price
A Redgrass-style palette is the better buy when you already paint often or in long sessions and want a dedicated, better-sealed system rather than a basic tray. The payoff is moisture control and build quality: the lid seals more securely, the tray is designed to be left set up, and the mixing surface is more consistent from session to session.
Choose this route if:
- You paint most weeks and keep a palette loaded between sessions.
- You want a sturdier tray and lid than a starter plastic pan.
- You would rather buy once and keep using a system with its own refills.
What to check: what consumables the palette needs and how easy they are to replace, whether the lid actually seals for overnight storage, and whether the tray fits your usual painting spot. The XL version gives you more mixing room; the Lite version trades that room for a smaller, lighter footprint.
XL and larger palettes: when size matters
A larger palette is worth it when you need many colors open at once or you are painting something big. Vehicles, monsters, terrain, and batch-painting five infantry models in one scheme all benefit from more mixing area, because you can keep every shade in the recipe alive in the same session.
The trade-offs are practical: a big tray takes up desk space, holds more water, and is harder to move mid-project. If your painting spot doubles as a work desk, measure before you buy.
Lite and travel palettes: when smaller wins
A compact or Lite palette is the right call when space, weight, or portability matters more than mixing area. It fits in a paint bag, sets up on a small desk, and is enough for a single figure or a quick evening session. The trade-off is obvious: fewer colors open at once, so you will re-mix more often.
DIY wet palettes: what actually works
You can build a usable wet palette from a shallow airtight food container, a clean sponge that fits it, and a sheet of parchment or baking paper. Soak the sponge, lay the paper flat on top, press it down so it wicks water evenly, and add paint. Keep the lid on between sessions.
What separates a DIY palette that works from one that fails:
- The paper. Parchment or baking paper passes a little water through; waxed or greaseproof paper does not, and the paint will sit on top and dry.
- The sponge. It should be clean, flat, and slightly thinner than the tray so the paper makes full contact.
- The seal. A lid that closes properly is what keeps paint usable overnight and stops mold from taking hold.
Check the setup after a session: if water pools on the paper, wring the sponge out more; if the paint dries too fast, the seal or the sponge is the problem.
Wet palette vs dry palette
Use a wet palette when you want to blend colors, keep mixed shades workable, and paint thin, smooth layers. Use a dry palette, tile, or ceramic dish when you want paint to stay exactly where you put it and dry on your schedule.
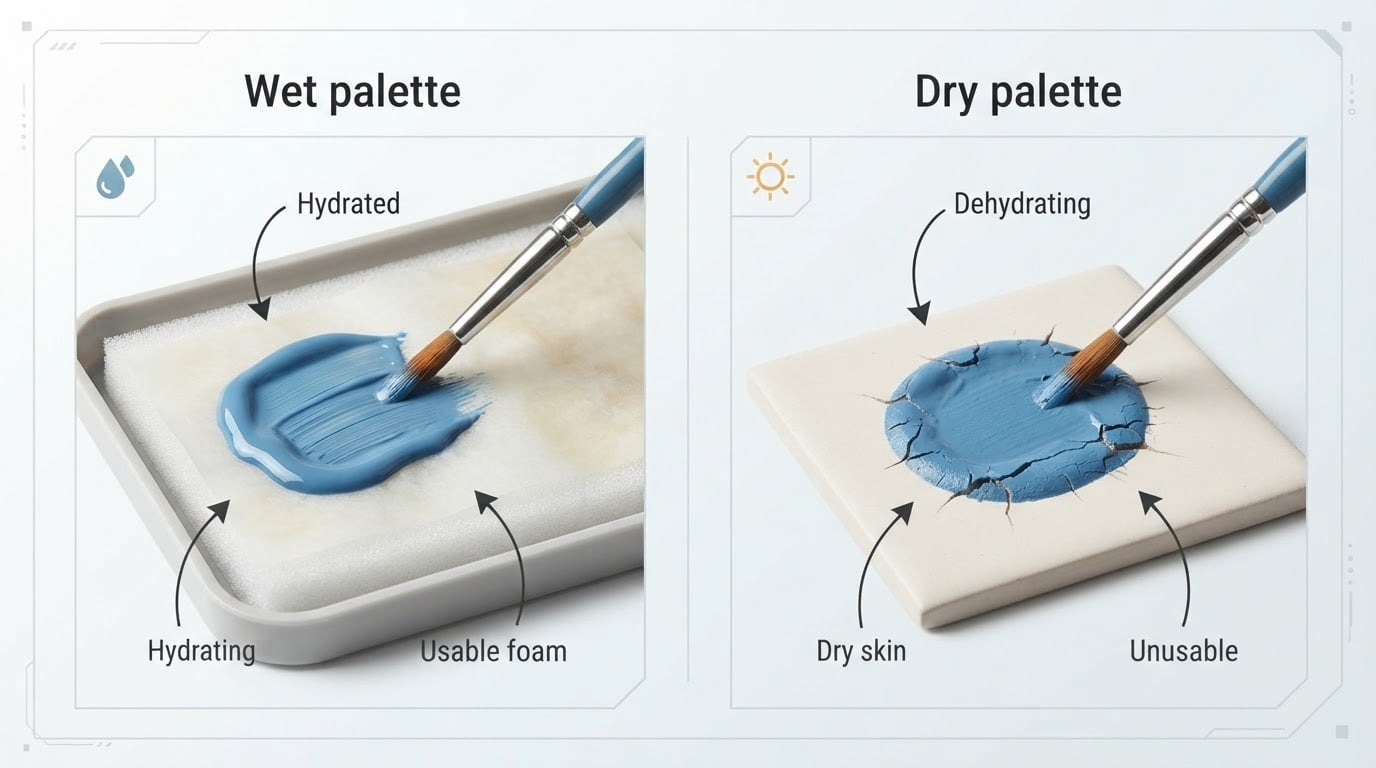
A dry palette is not the beginner-friendly default, but it is the better tool for some jobs: drybrushing, edge work where you want full control of the paint load, and quick mixes for basecoating that you do not mind losing. Many painters end up with both, because the two surfaces solve different problems.
Is a wet palette worth it?
For most acrylic painters, yes, and the case is simple. Paint that stays workable for hours means less waste and less re-mixing, and a wet surface makes the blends that beginner guides keep asking you to practice easier to reach. The cost is a tray plus paper; the savings come from every mix you do not throw away.
You can skip it if you paint rarely, work mostly with techniques that want a dry surface, or already paint fast enough that drying is not the bottleneck. For everyone else, it is one of the cheapest upgrades to a painting session.
How to set up your first wet palette
- Soak the sponge. Saturate it, then squeeze out the excess so it is damp rather than dripping.
- Lay the paper on top. Press it flat so water wicks through evenly. Some papers need a minute to saturate.
- Add paint. Put out the colors for the step you are on, leaving space to mix between them.
- Mix and paint. Pull a little water up from below as you mix, and the paint will thin gradually as you work.
- Close the lid between sessions. That is what keeps the paint usable for the next sitting. If the paper dries out, add water to the sponge, not directly onto the paint.
Your completion standard is simple: paper evenly damp, no standing water, no dry patches at the edges.
What to check before you buy
- Consumables. Confirm what the palette needs, whether that is paper sheets, sponges, or a reusable membrane, and how easy those parts are to replace. A cheap tray with hard-to-find refills is a false economy.
- The lid. If you plan to leave paint on the palette between sessions, the seal matters more than the tray size.
- Size against your models and desk. A small tray is fine for infantry and details; large models and batch painting want more mixing room. Measure your desk before going big.
- The full price, not the headline price. Sets, refills, and shipping change the real cost. Check the current listing rather than trusting a guide written in another year.
- Availability where you live. If you cannot get refills locally and do not want to wait on shipping, plan for that before you commit to a system.
- Return policy. If you are unsure between sizes, buy where you can return or exchange.
FAQ
Do you need a wet palette to start miniature painting?
No. You can paint your first models with a dry palette or a ceramic tile. A wet palette makes a session easier to manage, especially for blends and longer sittings, but it is an upgrade rather than a requirement.
Is a wet palette worth it for a beginner?
Yes, if you paint with acrylics regularly. It keeps mixed colors usable for hours, which means less paint wasted and more time practicing instead of re-mixing. If you paint once every few months, a basic dry palette is enough to start.
Can I make a DIY wet palette?
Yes. A shallow airtight container, a clean sponge, and parchment or baking paper are all you need. Keep the sponge damp rather than flooded, and use a lid that seals so the paper does not dry out between sessions.
What is the difference between the Redgrass XL and the Lite?
They are aimed at different working spaces. The XL gives you a larger mixing area for batch painting and big models; the Lite trims the footprint and weight for smaller desks, travel, and short sessions. Pick based on how many colors you keep open at once.
How long can paint stay usable on a wet palette?
Long enough to cover a normal painting session, and often overnight if the lid seals well. It depends on the paint, the water level, and the seal, so treat "still usable tomorrow" as a bonus rather than a promise, and check the paint before you rely on it.
How do I stop mold on a wet palette?
Close the lid between sessions, use clean water and a clean sponge, and do not leave paint sitting for days. If you see or smell mold, replace the paper and sponge and wash the tray before you use it again.
Do you need special paper for a wet palette?
You need paper that lets water through slowly. Parchment or baking paper works for a DIY setup; waxed or greaseproof paper does not. If you buy a palette, use the refill paper or membrane it was designed for, and check the refill price before you commit.