The short answer: match the technique to the job
A wash and a glaze both use thin, translucent paint, but they are asked to do different work. A wash is a fluid, semi-transparent layer designed to flow off raised areas and settle into crevices, where it reads as shadow. Army Painter's wash guide describes that behavior and recommends working one section at a time instead of flooding the whole model.
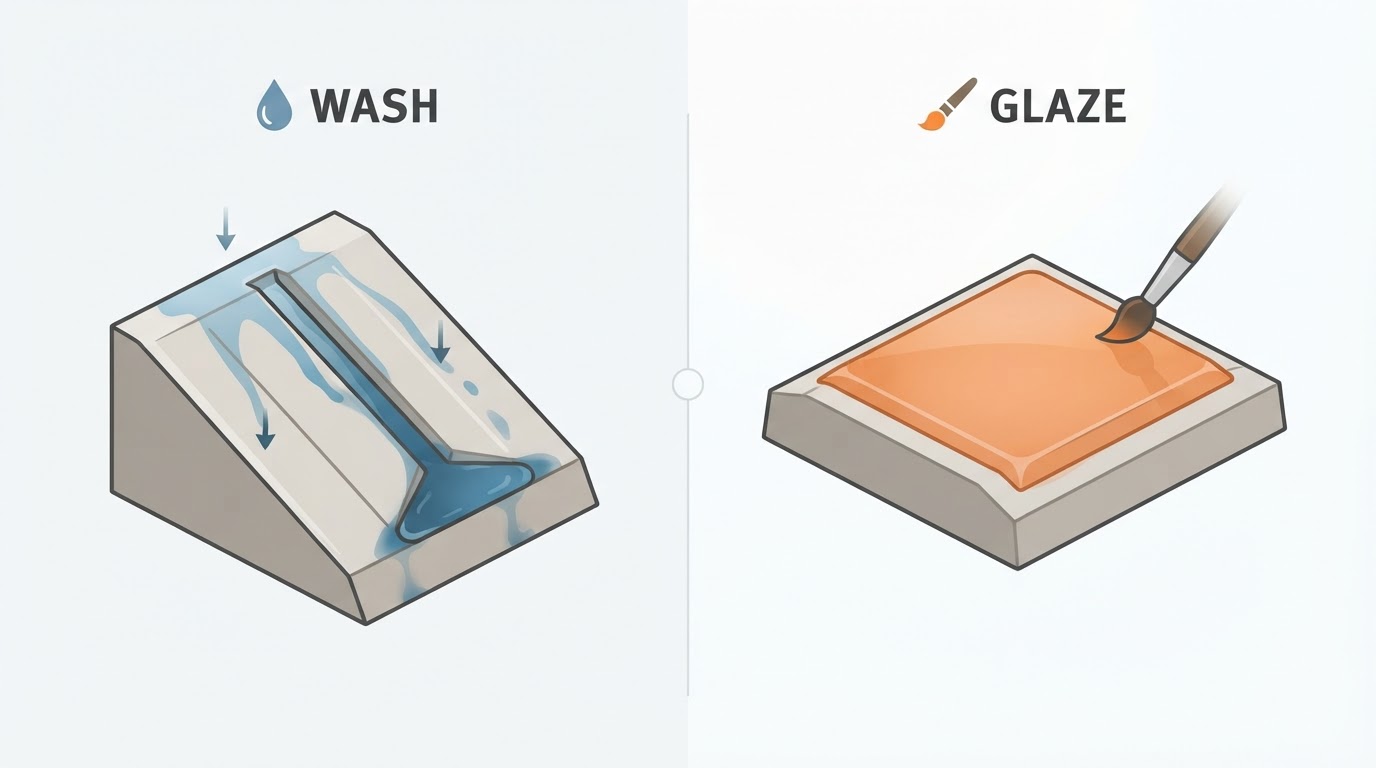
A glaze is different. It goes over paint that has already dried as a thin, translucent layer that changes color gradually. Army Painter's glazing overview describes glazing as targeted color adjustment and smoothing, with a smaller, more controlled brush load than a general wash and a full dry between passes.
That difference decides most real choices. If the problem is that a panel line, fold, or texture needs depth, start with a wash. If the problem is that an area needs to be warmer, cooler, richer, or smoother without hiding what is underneath, start with a glaze.
Labels are a starting point, not a promise that products are interchangeable. Some washes are thin enough that a careful painter can use them for a glaze-style pass, and some glaze or medium products are compatible with a wash-style application, but whether a given product can be used outside its labeled job depends on that product and its maker's guidance rather than on the category name. Before you try it, check a small sample on a spare base and follow the manufacturer's instructions for the product you actually own. Army Painter's ready-to-use statement concerns its Warpaints Fanatic Wash, not every wash on the market.
Decide by surface and goal
Use the surface in front of you rather than a general preference for one technique. Textured areas reward flow. Flat areas punish excess liquid.
Situation | Better first choice | Why |
|---|---|---|
Panel lines, fur, chainmail, rubble, deep cloth folds | Wash | The liquid runs into recesses and leaves the raised areas lighter, so the model does the shading for you. |
Large smooth armor plates, cloaks, vehicle panels | Glaze, or a targeted wash | A flood on a flat surface has nowhere to hide and can dry into rings; a glaze stays where you put it. |
A harsh jump between two highlight layers | Glaze | Thin translucent passes soften the step without repainting the whole area. |
You want a warmer, cooler, more saturated, or slightly darker version of the same area | Glaze | The layer tints what is underneath instead of covering it. |
Fast shading across a textured unit | Wash | One guided pass over a section adds contrast quickly. |
A deep line that must stay crisp while the flat stays clean | Targeted wash with a small brush | Placing the wash only in the line keeps the surrounding surface bright. |
A table is a starting point, not a rule. A wash can also be placed selectively, so "wash" does not automatically mean "flood the whole model." A glaze with too much liquid on the brush can pool and leave edges too, which turns a color adjustment into a cleanup job.
How to glaze miniatures: thin layers, controlled load
This is the short version of how to glaze miniatures without turning the surface into a puddle.
- Start on fully dry paint. A glaze sits over what is already there, so the previous layer needs to be dry enough not to lift.
- Load the brush, then wick most of the liquid onto a paper towel. The brush should be damp rather than wet. If a bead forms as soon as the brush touches the model, there is probably still too much on the brush.
- Apply one thin, even pass in a single direction over a small area. Do not scrub back and forth; keep the leading edge wet until you finish that area.
- Stop and let the pass dry completely. Then judge the color and add another thin pass only if you need more.
- Build the effect over several passes. Army Painter notes that glazing is a gradual technique, so one pass is often subtle by design rather than a sign that something failed.
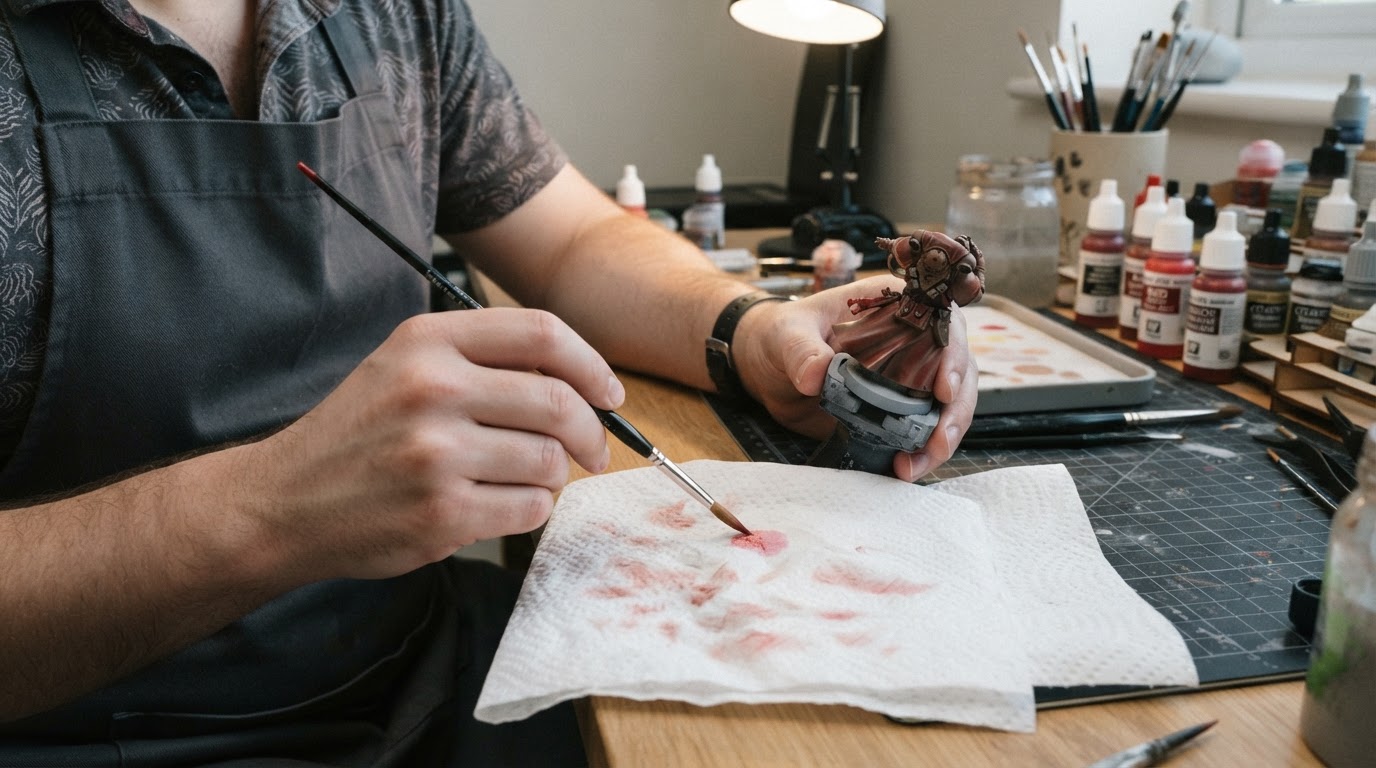
A glaze is not a reliable shortcut to a bright, opaque highlight over black. A translucent yellow over a dark base can shift the surface toward a warm, muted tone, but it will not usually read as a clean, bright yellow, because the layer is translucent and the value underneath still limits the result. How far a given product moves the color depends on its pigment load and opacity, so test it on a spare surface rather than assuming an exact outcome.
How to apply a wash by sections
The wash procedure is different because you are inviting flow.
- Make sure the basecoat is completely dry before you start.
- Load enough wash to cover one section, but not so much that it drips off the brush.
- Work one section at a time, moving the brush in the same direction and pushing the liquid toward the areas that should be darker. Let the wash flow into the recesses instead of scrubbing it into the surface.
- Watch the section while it is still wet. If wash is pooling on a flat area, pick the excess up with a clean, slightly damp brush. Do not wait until it dries.
- Stop touching it once it begins to set. Let it dry fully before adding another layer or another color.
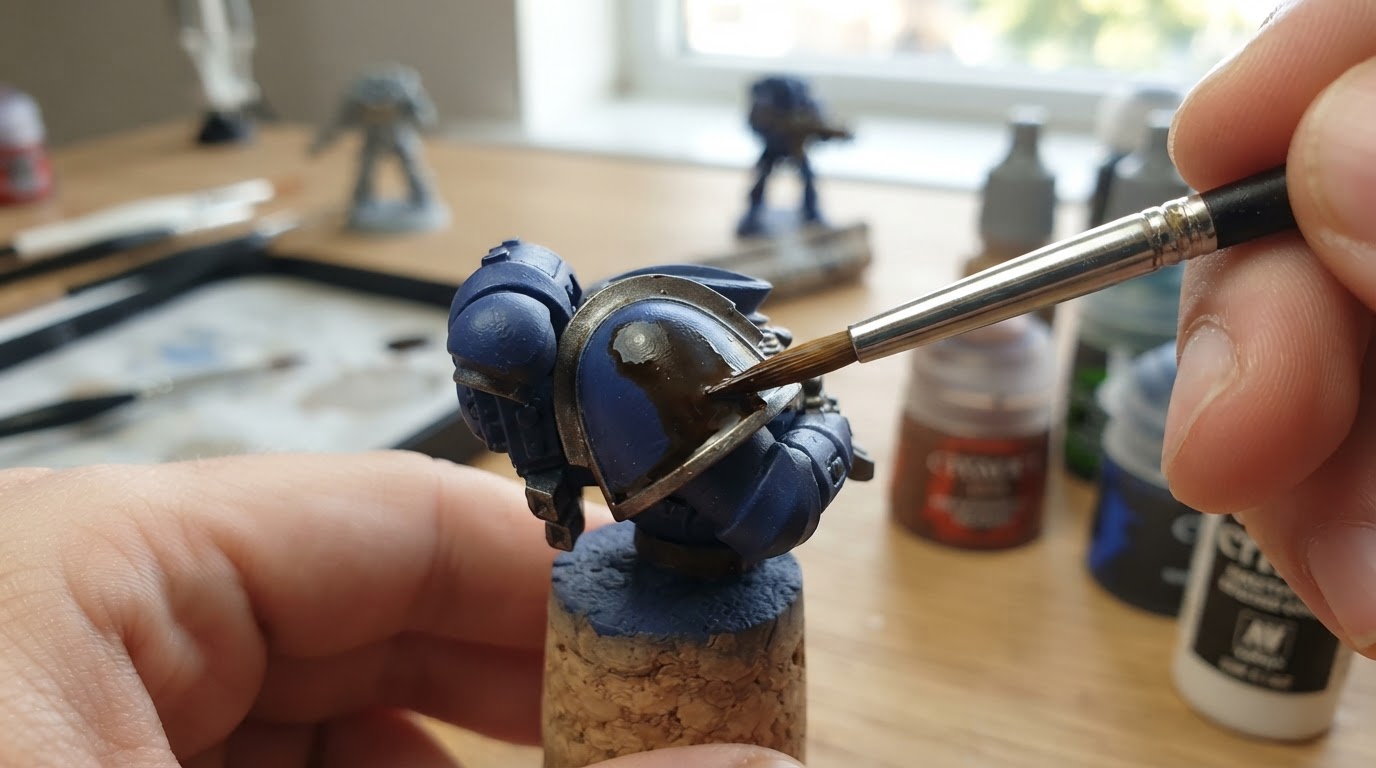
Army Painter's wash guide describes working one section at a time, controlling pooling with a clean, slightly damp brush, and letting the section dry, which places the correction while the liquid is still wet. The same page notes that its Fanatic Wash is ready to use from the bottle; that statement is about that product line, not a universal rule for every wash.
Both procedures assume the model already has a fully dry, suitable underlying painted layer, since a wash or glaze only modifies what is already on the surface. A glaze can follow basecoating or layering, while a wash can provide the first shading. If that earlier stage is still unfamiliar, our guide to painting miniatures with acrylics covers basecoating, layering and shading in the order they are normally built up.
Troubleshooting pooling and tide marks
A ring or tide mark on a flat panel. A tide mark forms where a pool of liquid dried at its own edge. If the surface is still wet, lift the excess with a clean brush. If it has already dried, painting the base color back over the ring and feathering the edge into the surrounding area is a cautious correction that may reduce the mark; it is not a guaranteed fix for every dried film, and it can leave a slight texture or color difference of its own. Test the correction on a small area first, and if the mark survives, adjust brush load or product on the next attempt rather than repainting repeatedly.
The glaze is beading or pooling instead of staying flat. Brush load is one common cause, but not the only one. A surface that still carries mold release, fingerprints, grease or a very glossy cured layer can repel the liquid, and some products simply bead more than others because of how they are formulated. Wick more off the brush and work a smaller section first, and if the liquid still pulls away, clean and prepare the surface or check the maker's guidance for that product.
The wash left dark blotches on armor. A wash is very good at flowing, which is exactly why it can collect on smooth surfaces with nowhere to go. Switch to targeted application for those areas, or use a glaze when the goal is a color shift rather than a recess shadow. Blotches can also come from a wash that was applied too heavily for the section or from a surface that was not clean.
The surface looks patchy after drying. Going back over a wash or glaze while it is setting can disturb the drying film, but patchiness can also come from uneven brush load across the area, from a product with weak pigment dispersal, or from an underlying layer that was not fully dry. Stop and let it dry fully, then judge on a small test area before adding more.
The first glaze pass did nothing visible. That is normal for a thin translucent layer. Add another pass after the first is dry. If several passes still do not shift the color, the product may be too weak for the shift you want, or too close in value to the layer beneath, so consider a different pigment before assuming the technique is wrong.
The wash looks shiny in spots. Shiny patches can appear where excess liquid collected and dried, but the same effect can come from a medium-rich wash, incomplete mixing in the bottle, or a cured layer that was already satin or gloss. Check the product and the surface before you assume the load is the only culprit, and wick pooling areas while they are still wet.
Keep the limits in view
There is no universal dilution ratio that works for every paint, medium, and surface. A ratio that behaves well on a wet palette in a humid room may be too thin on a dry day, and a mix that works for one pigment may separate or turn chalky with another. Start with a small test patch on a spare base or a piece of primed plastic, and adjust the load before committing to a finished model.
There is also no guaranteed number of coats. A glaze builds gradually, so the number of passes depends on the pigment, the base value, and how strong you want the shift. Treat any fixed "three coats" promise with suspicion.
Finally, not every transparent paint behaves identically. A pre-mixed wash, a wash medium, a glaze medium, an ink, and a heavily thinned basecoat can all look similar in a bottle and behave differently on a model. Products that are compatible enough to be used outside their labeled role do exist, but the maker's guidance for the specific product is the only reliable basis for trying it, and a sample on spare plastic is the cheapest way to find out.
A short pre-paint check
Before the brush touches the model, ask four questions: What is the surface, textured or flat? What is the goal, recess shadow or color shift? Is the previous layer fully dry? Is the brush damp rather than wet? If you can answer those, you have already avoided most pooling and tide-mark problems.