Start With a Surface Yellow Can Sit On
A translucent yellow shows whatever is underneath it. That is why the first pass can look blotchy over a dark undercoat, and why the usual reaction—adding more yellow—turns the armor into a thick layer that fills the very edges you wanted to keep. An opaque yellow behaves differently: it can cover a light undercoat on its own, and there the trouble is more likely to be a heavy coat than a dark one.
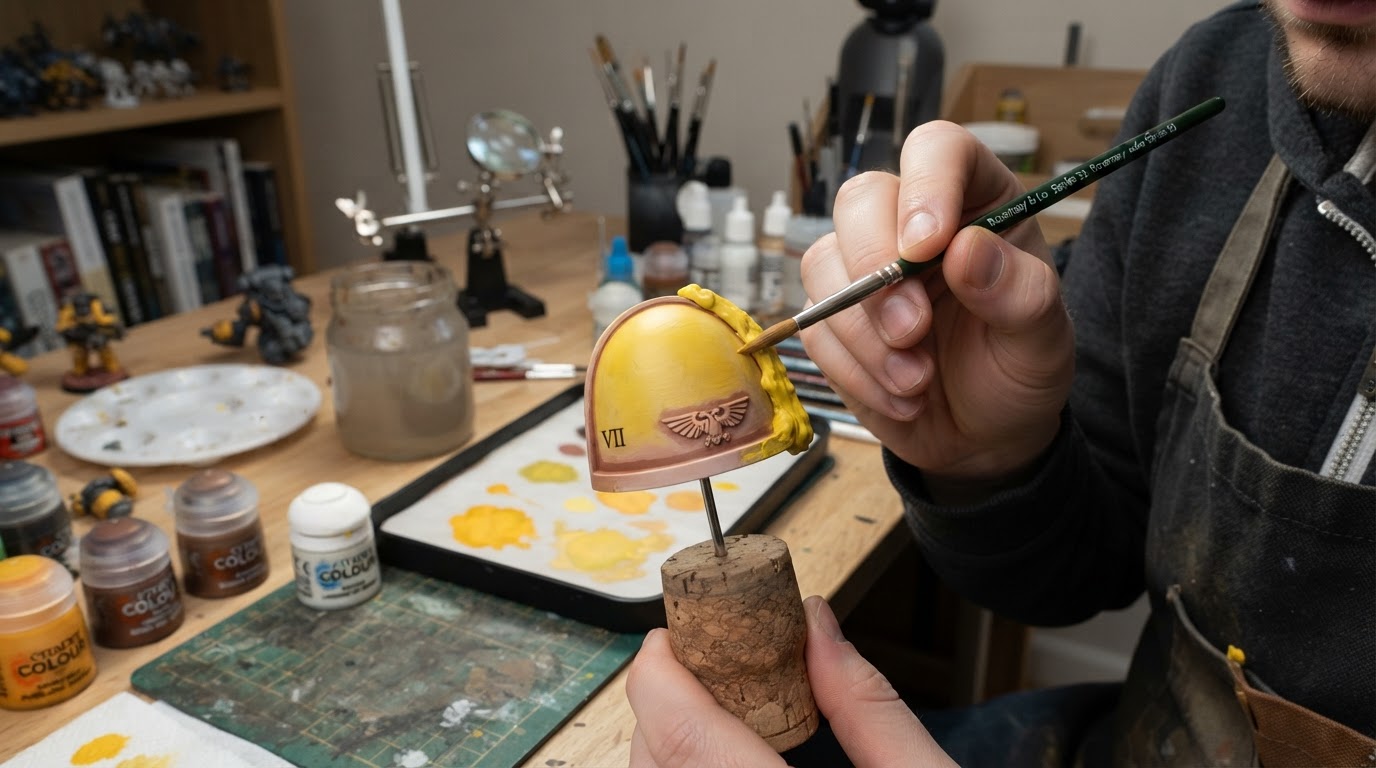
The fix is mostly to change the order of work: get a light, smooth foundation, decide where the shadows should sit, and build the yellow thin enough that it follows the shapes underneath. How much of that foundation survives to the end depends on the paint.
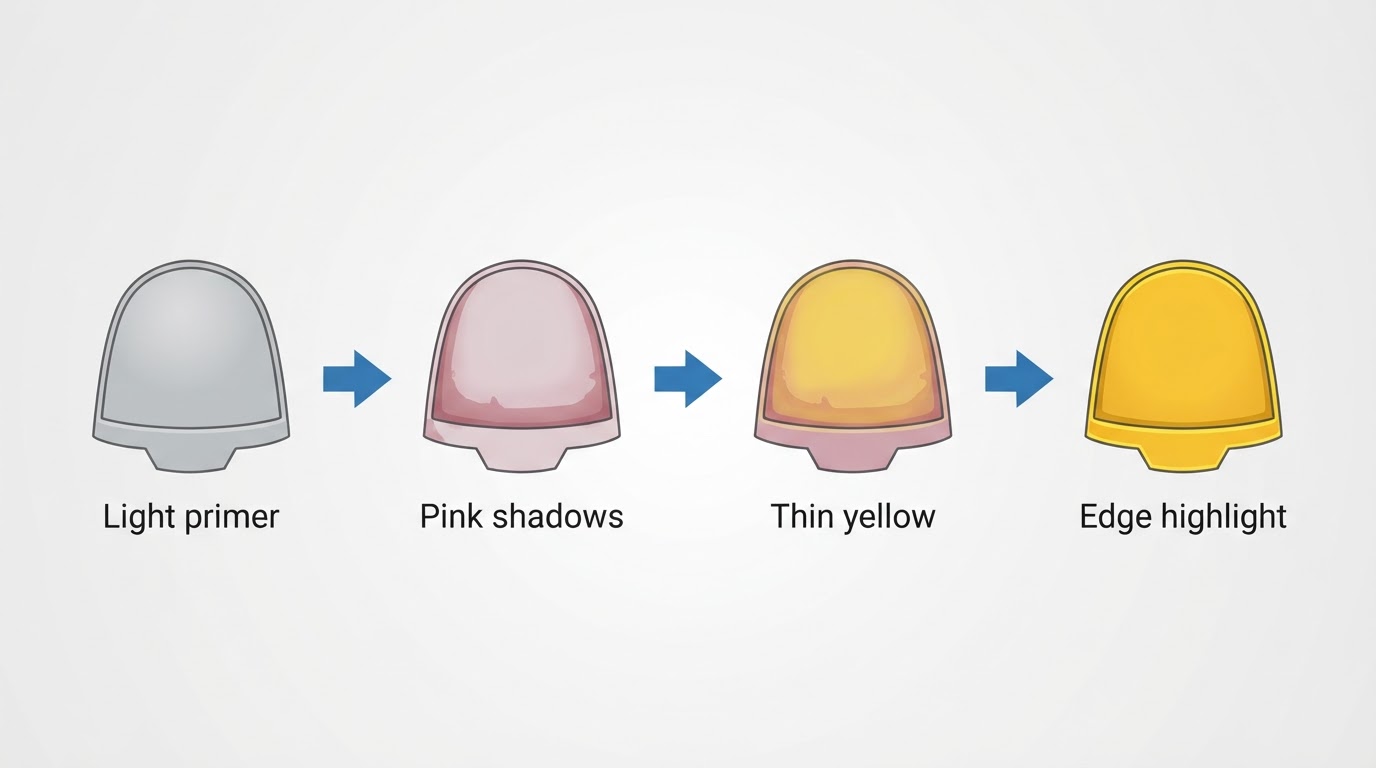
What You Need Before the First Coat
- A light gray or white primer, fully cured.
- A pink, red, or magenta for an optional warm shadow undercoat.
- A yellow you like working with: a translucent acrylic, a yellow ink or a Contrast-style paint for thin layered passes, or an opaque yellow if you want it to cover on its own.
- A pale yellow or pale sand for edge highlights.
- A fine brush for edges and rivets, plus a larger brush for the armor panels.
- A wet palette if you want to keep a thinned mix workable while you move around the model.
- An airbrush is optional. None of the steps below require one.
What Color Primer for Yellow Paint?
Light gray or white primer gives a transparent yellow the highest value to work over. With a translucent paint, a dark primer is not impossible, but it takes many more passes before the surface stops looking patchy, and every extra pass is another chance to fill a panel line. If you plan to add warm shadows, a light starting point also makes it easier to see where the pink is landing.
Check the primer before you start painting. A smooth, fully cured surface gives thin yellow layers something even to sit on. Lumps, dust, and mold lines will still show through a transparent yellow, because the paint follows the surface instead of filling it.
Use Pink to Put Warmth in the Shadows
Painting yellow over pink is optional, but it is a useful way to warm the shadow areas without darkening them. Pink supplies red while keeping the value light. Where a transparent or semi-transparent yellow goes over pink, that area comes out warmer and slightly orange; where the yellow sits over white or pale gray, it stays cleaner and brighter. The gradient is built into the undercoat instead of painted on afterward.
Forgone Miniatures' yellow-armor test is one worked example. Andy started from gray primer with a white zenithal highlight, then used a reverse-zenithal of Vallejo Squid Pink to put pink into the shadow areas before brushing Iyanden Yellow Contrast over the armor, with Flash Gitz Yellow on the rivets and the edges in the more orange areas and Pale Sand on the yellower edges. He reported that the Contrast paint pooled in the recesses and said an airbrush might have applied it more evenly—a plan for a future attempt rather than a tested improvement. Treat the palette as one painter's example, not a shopping list.
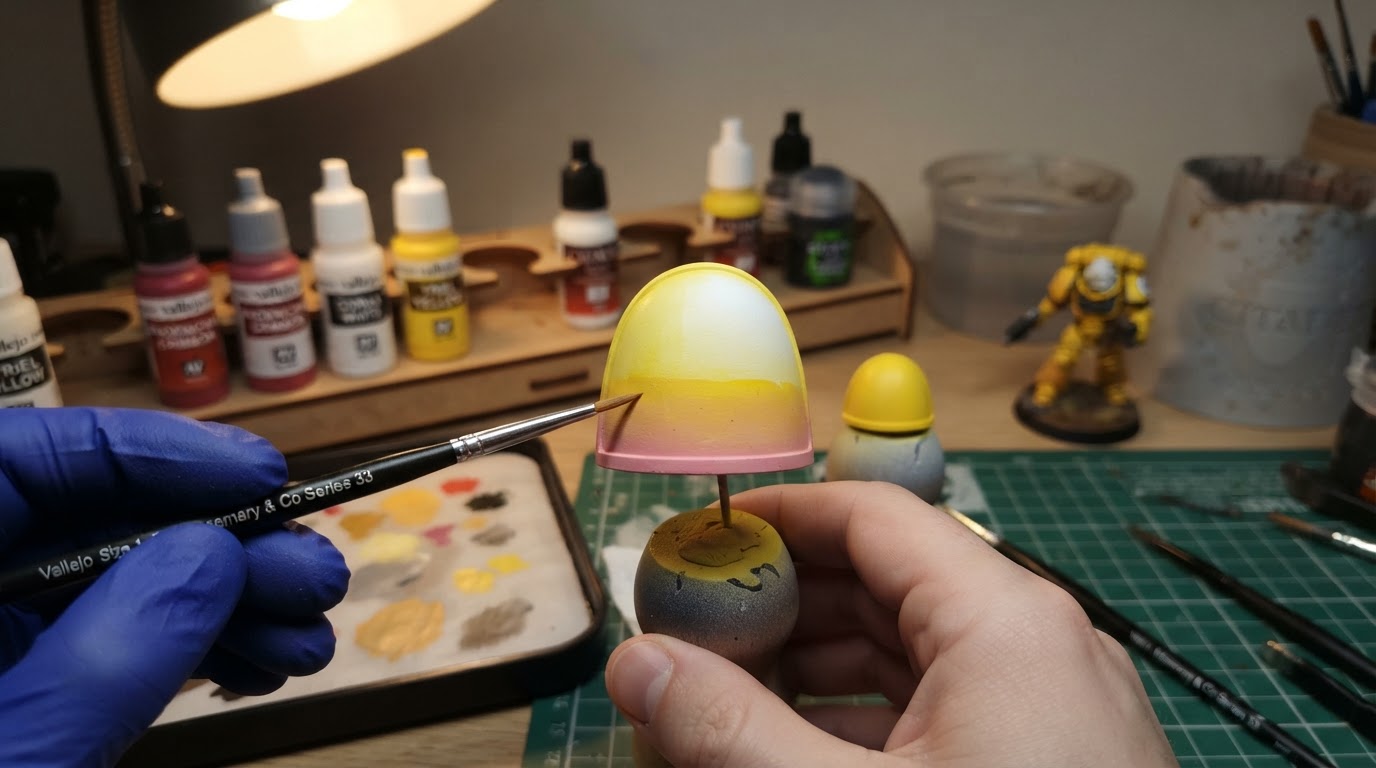
The practical rule is that pink belongs where you want warmth, not everywhere by default. Keep it in the recesses and lower surfaces if you want the top plates to stay a clean yellow; if you want the whole army warmer, an all-over pink undercoat is a legitimate choice, and the finished yellow will lean orange rather than lemon.
Build the Yellow in Thin Passes
Once the foundation is ready, the yellow itself needs patience rather than volume. Work panel by panel, keep the layer thin enough that it does not bridge detail, and follow the paint's own drying guidance before adding the next pass—some paints want a few minutes, others much longer, and the manufacturer's instructions are a better guide than a guess. Reworking a half-dry transparent yellow is how brush marks and torn patches get into the finish.
Contrast-style paints are designed to gather in recesses, and that behavior matters on flat armor. Pooling is the paint doing its job, but on a large plate it also means the color can settle unevenly. A normal thin acrylic or ink gives you more control over where the yellow sits. Either way, if the surface is still uneven after a pass has dried, add another thin pass rather than a heavy one. Stop when the yellow reads as a consistent color from arm's length; the pink-to-white gradient should still be visible as a change in warmth rather than disappear under a flat coat.
Thin, built-up yellow is essentially a layering approach. If you want to see how it relates to glazing, wet blending or drybrushing, the guide to miniature painting styles puts the main approaches side by side.
Keep the Recesses and Edges Separate
Yellow has a narrow range of values, so the shape of the armor has to come from the contrast around it. Two moves do most of the work.
The first is to leave the recesses alone. Do not chase yellow into every gap; the darker undercoat or a thin recess shade should stay there and describe the join between plates. A deliberate dark line between panels reads as structure, where hoping the yellow will create one usually just makes the plate look uneven.
The second is to keep the edges crisp. Thin paint follows an edge; thick paint fills it. If a panel edge has gone soft, the problem is usually too much paint in that area, not a missing highlight.
Highlight Only Where the Light Lands
Highlights on yellow should be selective. Use the side of a fine brush on the leading edges and extreme trims—the top of a helmet, the gorget, a kneepad—rather than brightening every edge on the model. Match the highlight to the local color: a paler yellow or sand on the brighter areas, and a brighter yellow for rivets and panels that already lean warm. That keeps the highlight reading as light rather than as a second, paler armor scheme.
Keep the highlight line narrow. A pale edge one brush-width wide catches the light; a wide band flattens the shape.
Tidy Slips Without Repainting the Plate
Small mistakes are normal with transparent yellow, and they are easier to fix if you leave them until the surrounding area is dry. Use the base yellow to cut back a slip on a panel, and use the darker recess color to restore a line that got filled in. Repainting an entire plate to fix a single dot usually creates a patch that is harder to blend than the original error.
Work under the same light you used for the rest of the model. Yellow shifts noticeably between warm and cool bulbs, and a slip that looks obvious under a desk lamp may disappear in daylight, or the reverse.
Final Inspection
Look at the model at arm's length under the light you painted in. The yellow should read as one color, the recesses should still separate the plates, and the edge highlights should sit only where light would fall. If something is off, fix that one thing—another thin pass for streaks, a darker recess for flat plates, less paint where an edge has gone soft—then stop. Extra passes are how a finish that already works starts to fill in.