Decide Where the Glow Falls
Object source lighting, usually shortened to OSL painting, means painting the light that a lantern, blade, plasma coil or glowing eye casts onto the model around it. The effect is a lighting problem before it is a color problem: the paint has to agree with where the light is and what it can reach.
Trace a straight line from the source with your eye or a fingertip. Surfaces that face the source and have nothing between them receive light; surfaces turned away, or sitting behind an opaque cloak, armor plate or wall, stay out of it. Light does not bend around a fold to brighten the inside of a sleeve. The near face of an obstruction catches the light while its far side stays blocked, which is why a cloaked shoulder can be bright along one edge and untouched a few millimeters around the curve.
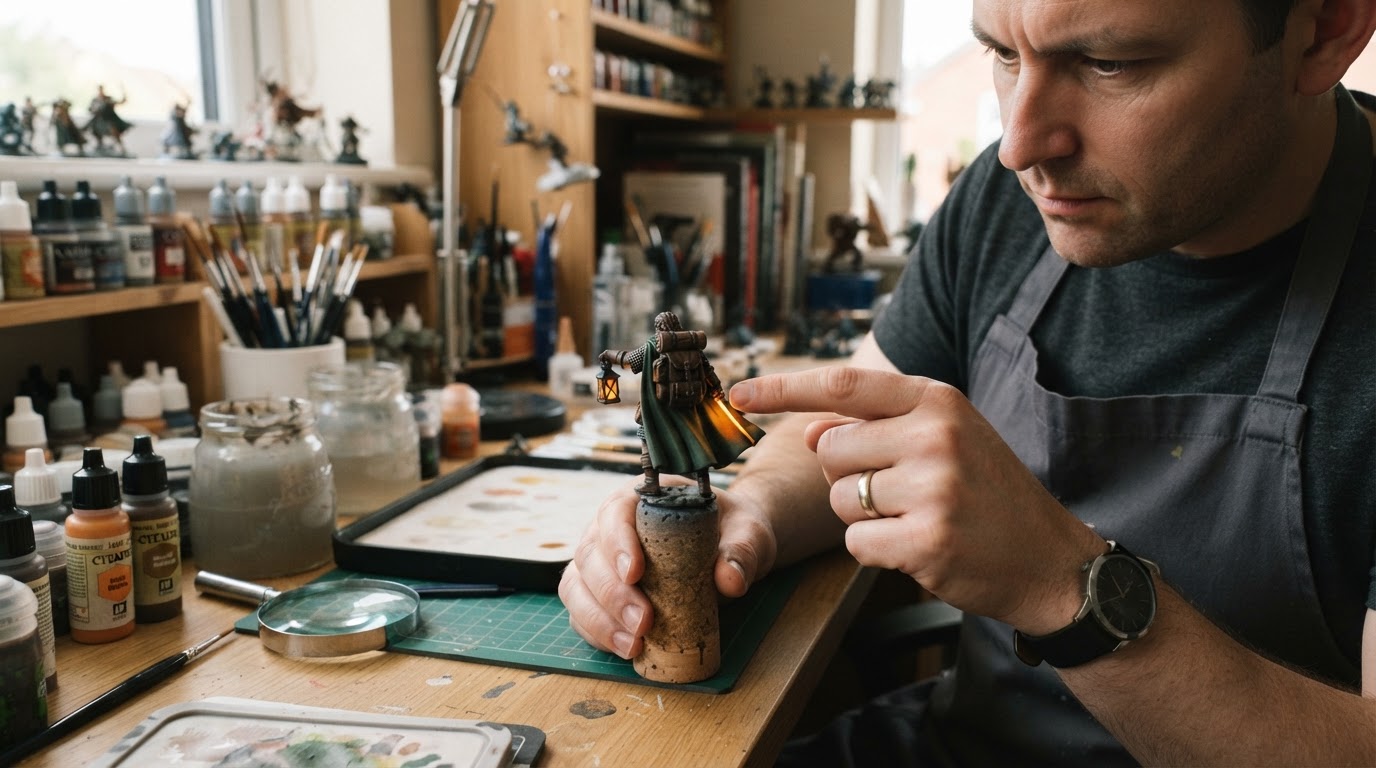
For an OSL mini painting project, start with one source and one limited area. A lantern beside an accessible cloak fold or a glowing blade beside an arm gives you a clear problem to solve. A light held high above a shoulder reaches different surfaces than one sitting near the ground, and adding the base to that path is part of the plan rather than an afterthought.
Put the Values in Order Before You Add Color
Within the glow you are painting, the source is the brightest mark, and the surfaces that face it sit one step below. Everything turned away from the source stays darker still. That order is what separates object source lighting from a colored patch, and it is the part most often skipped.
The comparison is local to the depicted light and its spill. It does not mean every small glowing detail has to outshine every bright mark elsewhere on the figure: a pilot light, a rune or a glowing eye can read as dimmer than a polished shoulder highlight or a sunlit edge lit by a different source. What matters is that nothing inside the glow outshines the object casting it, and that each lit surface is lighter than the unlit surface beside it.
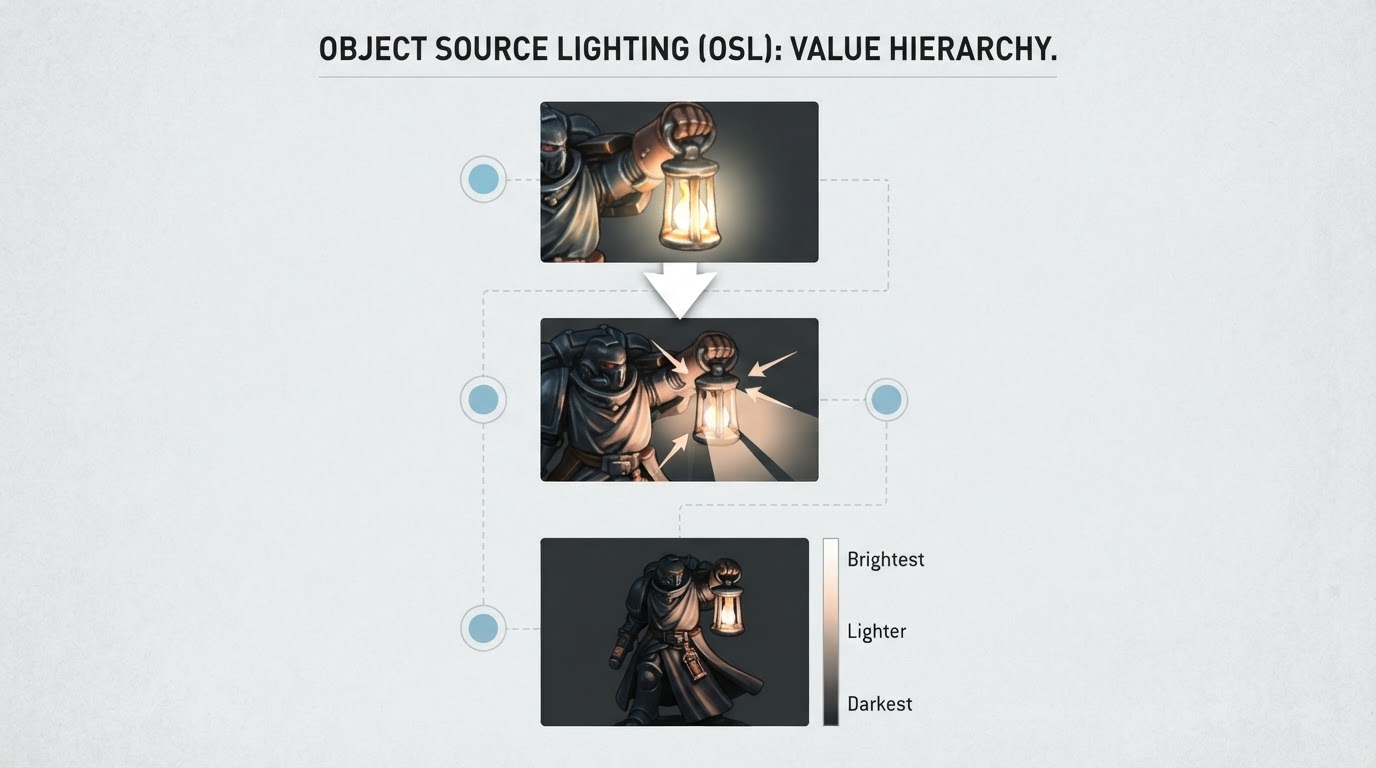
David's OSL tutorial on Light Miniatures states both halves directly: lit areas must appear brighter than surrounding unlit areas, and lit areas should not appear brighter than the light source they are lit by. He also notes that a yellow light source glazed onto an unchanged model usually fails because the glazed area ends up no lighter than its neighbors, or darker still. Darker glow colors such as green, red and purple destroy the illusion faster.
An OSL glow is layered onto a finished scheme rather than replacing it, so the rest of the figure still needs a consistent approach to light and contrast. If you are still deciding how to finish those areas, this comparison of miniature painting styles covers how grimdark, box art, comic and painterly methods each handle light, color and edges. It is also easier to build a believable miniature painting light effect on a model with a darker than average palette, because the contrast between lit and unlit areas is already there to work with.
Paint the emitting part itself with an opaque white coat before any color goes down. That white base gives a bright glaze something to sit on and keeps the brightest part of the source at the top of the local value order.
Glaze Outward With a Brush
Color comes last, in thin translucent layers. Load a saturated but not too dark glow color, wipe most of it off, and glaze over the midtones and highlights you painted around the source. The underpainting should still show through the tint. Each glaze pass covers a smaller area than the one before, so the glow fades with distance instead of stopping at a hard edge.
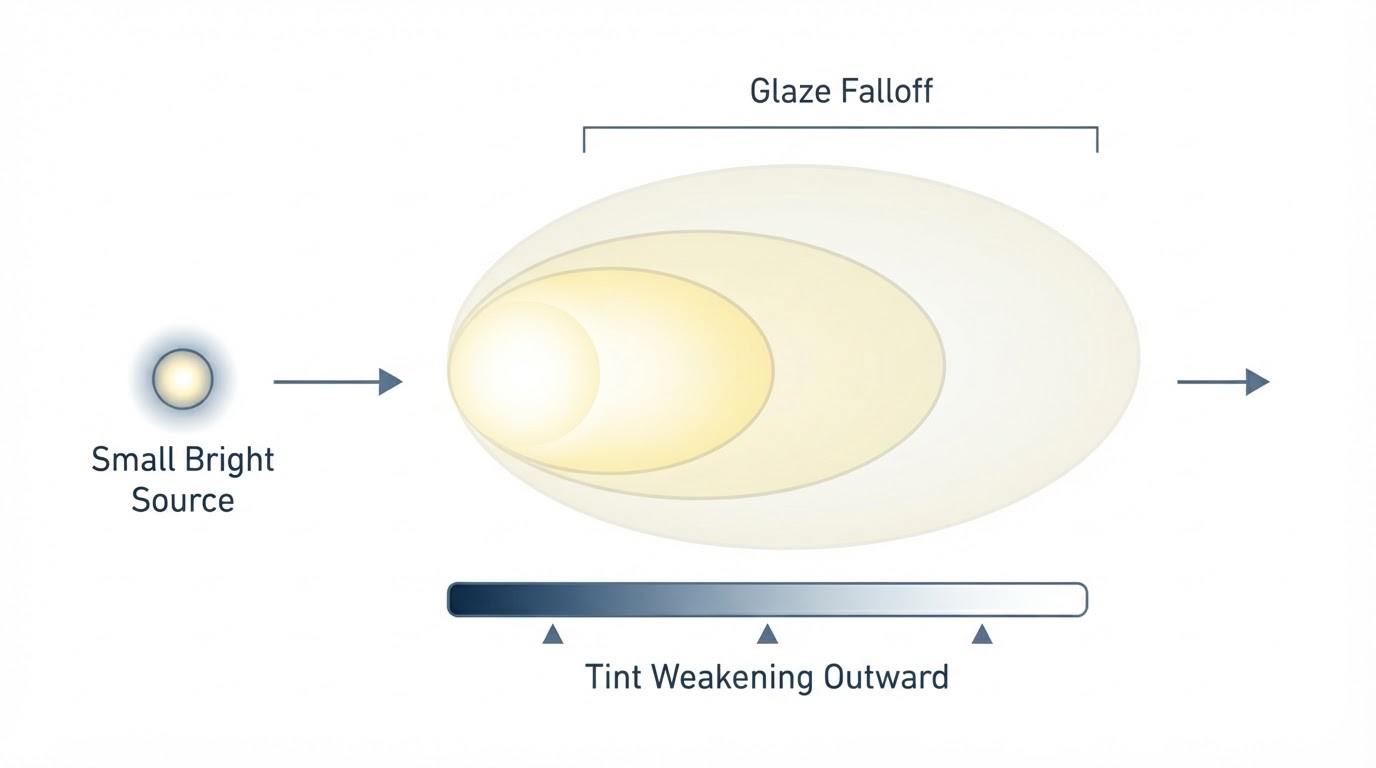
A brush, a little glaze medium and patience are enough to paint OSL without an airbrush. Work from the source outward, let each pass dry, and stop while the color is still subtle. An airbrush can smooth the transitions faster, but it does not replace the decision about which surfaces face the light. Painting OSL with brush glazes keeps every pass under control, which matters more than speed on a small figure.
The same rule works on metal, with one adjustment. Reflective surfaces concentrate reflected light instead of spreading it, so the glow shows up as a smaller, sharper reflection on a metal edge rather than a soft wash across the whole plate. Matte cloth spreads the same light over a wider area at lower intensity. David's walkthrough draws the same distinction, noting that on reflective materials the apparent lightness falls off less with distance even though the reflections themselves get smaller.
Keep the Glow From Spreading Too Far
A tint spread over half the figure does not make the light stronger. When the depicted source is a small lamp, a blade edge or a glowing eye, the color belongs only where that source could plausibly reach, and a wash across unrelated surfaces reads as a tint rather than light. The usual cause is that the color was carried outward by habit rather than by geometry. Check the surface in front of you: does it face the source, and is it close enough for the strength of the light to reach it? If either answer is no, leave it alone.
A broad glow is a different case, not automatically a failure. A bonfire, a beacon, a vehicle headlamp or an open furnace can legitimately color most of a base and a good part of the figure, so a large area of glow there is intentional. The test is the shape of the light rather than its size: it should still follow the source, fade with distance and leave some areas untouched or in shadow.
Keep one unlit area as a reference. On a lantern-lit figure, the far side of the cloak or the back of a leg can stay close to its original color, and that untouched value is what makes the lit side read as brighter. A second viewing angle helps for the same reason: a side view shows whether the glow has crept onto an area you meant to keep outside it. If it has, stop adding color at the fringe and let the original value show again.
Rescue Dark, Muddy Glazes
A dark colored glaze on its own does not increase value. It lowers it. Put a thin green or purple glaze over a midtone and the surface gets more colorful and darker at the same time, which is the opposite of what cast light does. The model then looks stained rather than lit.
The repair is to fix the value before you add more color. Lift the area that should be lit with a lighter version of its own color, or with a desaturated near-white, and only then glaze the glow color over it at thin strength. David's tutorial highlights the lit areas before the colored glaze for this reason, and it warns that very saturated, very dark colors are the hardest to glaze convincingly.
Two habits prevent most muddy results. Mix the glow color with a little of the underlying highlight color when the two are far apart, such as a green light on a red cloak, and build up in several weak passes instead of one strong one. If a glaze is still going dark, dilute it further rather than adding more pigment: the value comes from the underpainting, and the glaze only has to tint it.
Restore Contrast in the Shadows
Good OSL is as much about what stays dark as what becomes bright. Surfaces turned away from the source should be cooler, darker or less saturated, so the lit zones have something to contrast against. On a night scene, David keeps the shadows very dark and uses blue or purple in them to contrast with a warm light source, which makes the yellow glow read more strongly.
If the contrast has gone flat, resist the urge to add more glow color. Darken the surfaces that face away from the source, or knock back areas that were tinted without becoming lighter, then re-establish the lit values on the surfaces that actually face the light. The goal is a clear step between the two sides of the model, not an even wash across it.
Check the Glow From Arm's Length
Before you call the glow finished, step back to arm's length and look at the figure as a whole. Within the area the depicted light reaches, the source should still be the brightest value, each lit surface should be lighter than the unlit surface beside it, and no tint should sit on a surface the light cannot reach. Check a second angle, and check the model under ordinary room light rather than only under your painting lamp. If a check fails, correct the value first: more glow color will only make the same error more colorful.
For a complex figure, a quick lighting study is worth more than another glaze pass. Mark the source, the surfaces that face it and the areas that should stay dark, then keep that reference beside you while you paint. It is the cheapest way to keep the decisions consistent from one session to the next.