Why the whole face decides the read
At arm's length on a tabletop, the face is where the eye lands first. Paint only the eyes and you get a mask: correct features on a flat, unshaded surface. Paint the whole face and the small sculpted planes start doing the work for you. That is the difference between this sequence and our miniature-eyes tutorial — here the eyes are one small landmark inside a larger order of operations, not the whole job.
The order of operations
Work in five steps, in this order. Reaper's face-painting class handout likewise treats shadow and highlight placement as part of the whole face, not a separate eye-painting task:
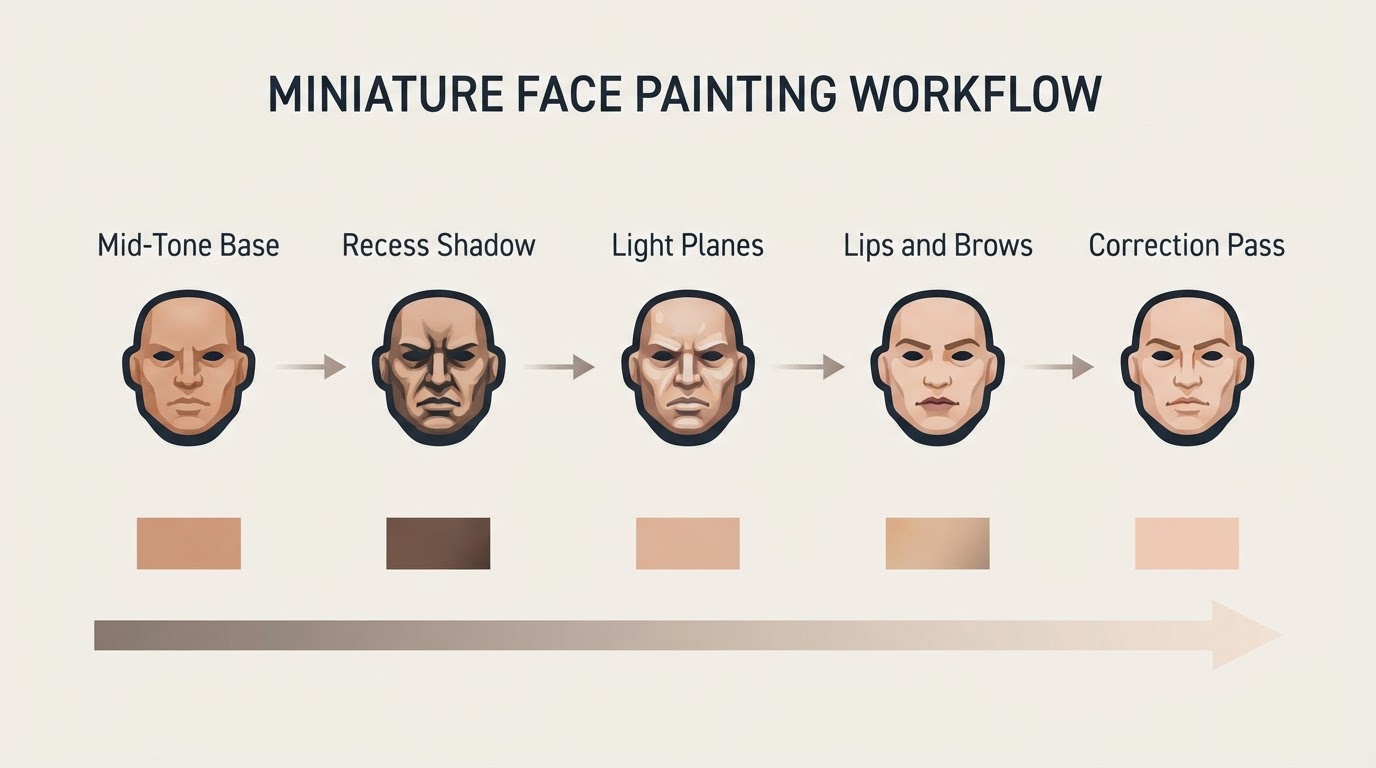
- Base the skin with one mid-tone.
- Shadow the recesses with a warm, controlled wash or glaze.
- Light the raised planes in two or three steps.
- Lips and brows get one simple pass each.
- Correct whatever still reads wrong at table distance.
Shadows come before highlights because they set the direction of the light. Highlight first and you are guessing where the dark should have been.
Step 1: One mid-tone base
Pick a skin tone in the middle of the range you want — not the lightest highlight and not the deepest shadow. Several thin coats are easier to control than one thick coat: the first may look patchy, while later coats can cover without filling in the sculpted brow, nose or cheek planes. Thin according to the paint maker's guidance and let each coat dry before the next.
Squint at the head from a step back. If the base reads as an average skin value and the features are still visible, you are ready to shade. If it reads pale and blank, the base is too light; go one step darker before you continue.
Step 2: Controlled shadows
Keep the shadow warm and out of the flat areas. A thin glaze or wash belongs in the recesses: the eye sockets, the sides of the nose, under the nose, the line under the lower lip, the jaw line where it meets the neck, and at the temples on angular faces.
Two habits keep this from turning muddy:
- Pin-wash instead of flooding. Touch the wash only into the recess and let capillary action pull it in.
- Wick out the pools. If wash gathers on a flat cheek or chin, touch a dry brush to it before it dries.
If the shadow dries too grey or too dark, glaze a little of the mid-tone back over the flat areas. On deeper skin tones, keep the shadow tight and the eventual highlights small, so most of the face stays in the mid-tone and shadow range.
Step 3: Planes of light
Now step the skin back up. Leave the shadow in the recesses and paint the raised surfaces in thin, increasingly light layers:
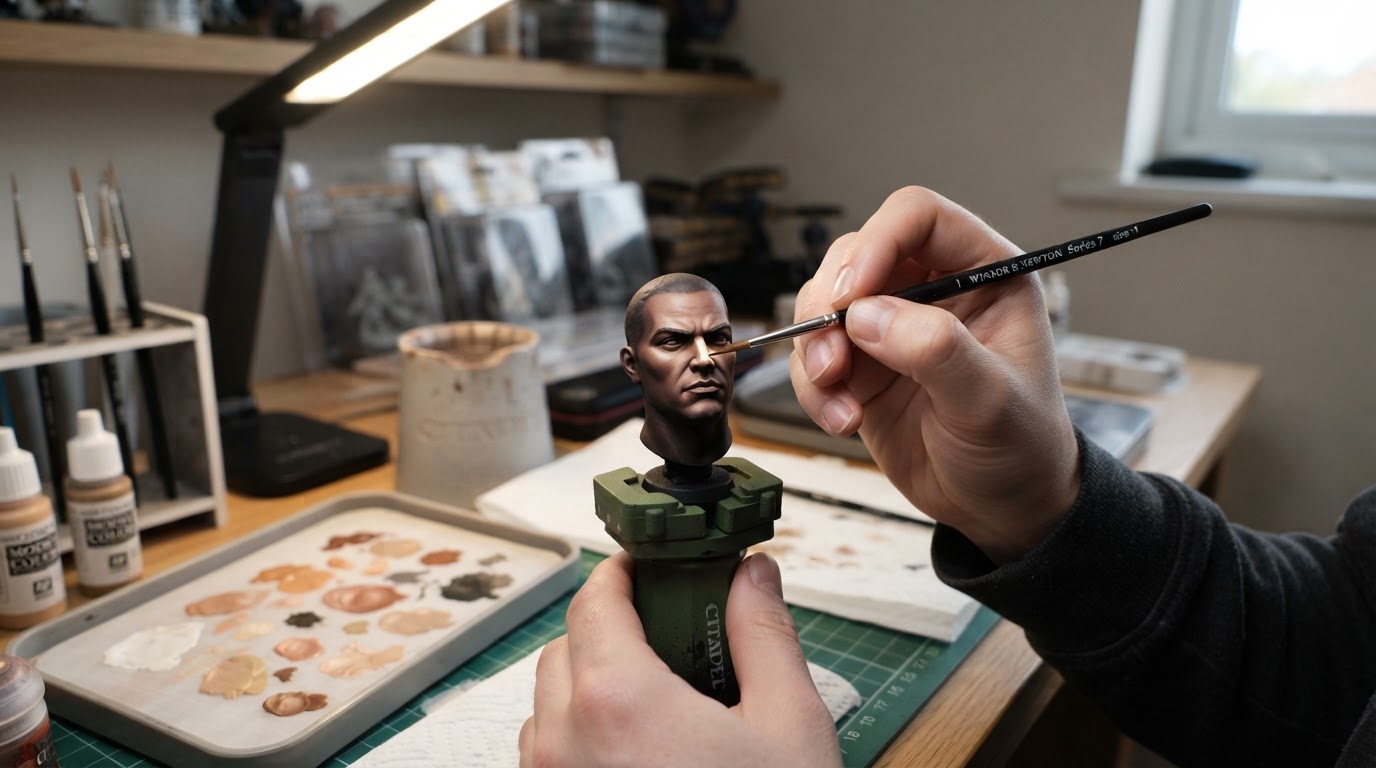
- First step: brow ridge, tops of the cheekbones, the bridge and tip of the nose, the upper lip plane and the chin.
- Second step: a smaller version of the same areas, in a lighter tone.
- Accent: one tiny bright touch on the nose tip or one cheekbone — not both, and never a bright dot in the middle of the face.
Standard miniature lighting comes from above, so those planes catch the light. If the figure is posed under a different light or the head is tilted, shift the light placement in the same direction.
Step 4: Lips and eyebrows
These are two-line jobs at this scale.
For the mouth, one thin line of a slightly deeper, redder tone along the mouth line is usually enough. A small highlight on the lower lip adds fullness; skip it if the lips start to look drawn on.
For the brows, follow the sculpt with a slightly darker, cooler tone than the hair, kept thin and slightly broken rather than a solid block. A lighter brow reads younger; a heavier, darker line ages the face.
Step 5: The correction pass
Look at the head from table distance — roughly 60 to 90 cm — not from up close. At that range, fix the biggest problem only:
- Blotchy or patchy skin: a very thin mid-tone glaze unifies it.
- A flooded recess: re-place the shadow with a pin-wash.
- A light step that went too far: glaze the mid-tone back over it and stop one step earlier next time.
- A mouth line lost under the glaze: repaint the single line.
Small corrections are almost always faster and cleaner than starting the face over.
Diagnostic table
What you see | Likely cause | Fix |
|---|---|---|
Face reads flat, like a mask | No separation between shadow and light | Re-shadow the recesses, then add the light planes |
Skin looks chalky | Highlights too opaque or too large | Thin them to a glaze and shrink the area |
Skin looks grey or muddy | A cool, flooded wash over the flat areas | Warm mid-tone glaze on the flats, pin-wash the recesses |
Cheeks or chin look dirty | Shadow painted on the plane instead of under it | Re-base the plane and keep the shadow beneath it |
Face looks harsh or angry | Shadow left heavy under the brow | Soften the brow shadow and lift the cheek light |
Blank at table distance | Detail too fine, contrast too low | Increase the gap between mid-tone, shadow and light |
Limitations worth knowing
- At 28–32 mm, the eyes, mouth line and brow are smaller than most brushes can resolve cleanly. Judge the result at table distance, not at two centimetres.
- The sculpt sets the ceiling. A shallow, soft face has less plane definition than a sharp one, and no amount of paint invents detail that is not there.
- Translucent speed or Contrast-style paints settle unevenly on flat skin planes. They can be a fast first base, but plan on a cleanup pass, especially on the cheeks and chin.
- Helmeted subjects and partial faces — a Space Marine head, for example — give you less skin to work with, so the same steps compress into fewer, stronger shapes.
- Photos flatter or flatten skin depending on the light. Trust the table read over a close-up lens.
FAQ
Do light and dark skin need different recipes? No — keep the same three values and change their level. A darker mid-tone with the same tight shadow and small highlight reads correctly; a pale mid-tone needs slightly softer shadow so the face does not look bruised.
How thin should face paint be? Thin enough that the first coat looks translucent and the second still shows the sculpt's planes. If the paint fills a recess on the first pass, it is too thick.
What if the face already looks bad? Run the correction pass first: unify with a mid-tone glaze, re-place the shadow, then one light step. Only treat the whole model as a strip-and-restart if the paint is thick enough to hide the sculpt entirely.