What to do when a squeeze produces nothing
The first priority is to reduce the pressure inside the bottle rather than add to it. Squeeze gently once to test, then stop. If nothing comes out, squeezing harder is the thing to avoid, not the thing to escalate.
Painters in this r/minipainting thread on clogging in bottle nozzles describe what happens when that pressure has somewhere to go: paint drying in the tip, a nozzle ejecting when the bottle was squeezed, droppers removed so the inside could be cleaned, and a pin bending through plastic into a finger. These are separate individual accounts from different people, not a measured failure rate, and they do not settle which brands are affected.
Wipe the neck and cap with a paper towel before going further. Dried paint in the threads obscures the opening and leaves paint where you need a clean seat later. Keep the bottle over the covered tray or bench rather than a sink, so a dropped nozzle or a spilled drop lands somewhere you can see it.
Is the tip plugged, or is the paint dry through?
Two different problems produce the same symptom, and only one of them is fixed at the opening.
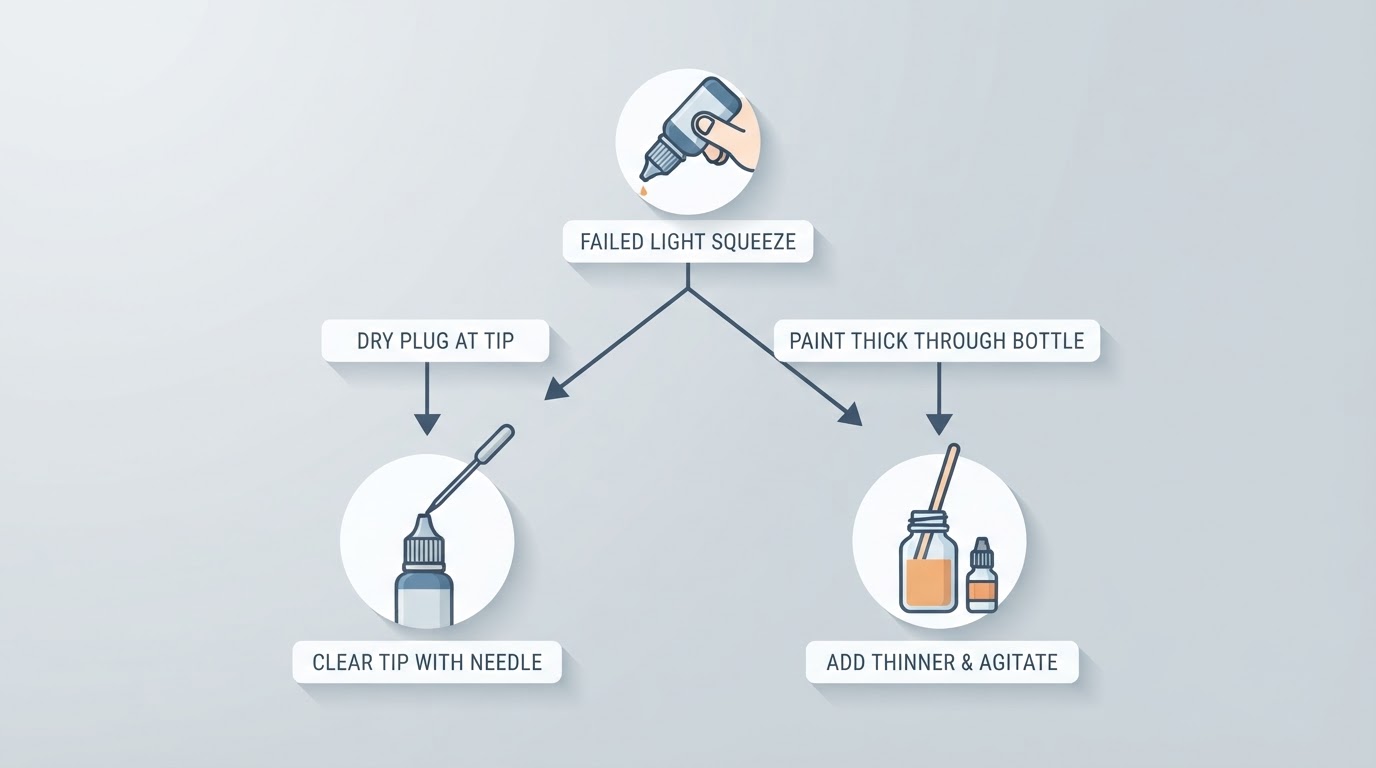
A plug at the tip is local. With the cap off, look straight at the opening. If a dry skin spans the hole, or the tip resists a light touch, the outlet itself is obstructed. Paint sitting in the opening between sessions dries first, because it is the paint with the most air exposure and the least volume to hold moisture. The body of paint below may be unaffected.
Paint that has changed through the bottle is a different case. If the opening looks clear, tilt the bottle gently and watch the paint at the shoulder. Thick paste that moves as a lump, or dried paint on the walls above the fill line, suggests the change goes beyond the nozzle, so clearing the tip will not restore flow by itself. How far the drying reaches inside cannot be judged from outside the bottle; that question needs the paint manufacturer's guidance for the specific product.
Liquid sitting on top of pigment is a mixing problem rather than an obstruction, and it is handled separately — see miniature paint separating in the bottle.
Clear a removable nozzle without forcing it
Not every dropper is made to come off. Check that the tip is a separate push-in piece before you pull on it. If it does not release with a gentle straight pull, stop: prying an inseparable tip, or working a blade around the seat, can crack the neck or distort the part that has to seal again.
- Hold the neck, not the body. Keep the bottle upright. If the dropper is removable, ease it straight out and set the bottle down on the tray.
- Support the part against a solid surface. Point the opening away from your other hand and away from your face. Ron Vutpakdi's beginner painting guide recommends a pin, needle or staple, and notes that a safety pin works well. Keep the tool lined up with the opening and your fingers out of its path.
- Work at the existing opening in short, controlled movements. Wipe the tool between attempts. The aim is to break the plug at the surface and restore the hole that is already there. Do not push a large dry plug down into the bottle, where it ends up in the paint you are trying to save.
- Do not drill, ream or enlarge the hole. A wider opening changes the drop size and weakens the tip, and it cannot be undone.
- Clean a detached nozzle on its own. Rinse the part over the tray, never over an open bottle, and keep rinse water and any cleaner out of the paint. Let the nozzle dry completely before refitting, because liquid carried back on the part dilutes the paint by an amount you cannot measure.
- Refit and test. Press the dry nozzle in until it seats evenly, wipe paint from the threads, and squeeze a drop onto a palette rather than onto the model.
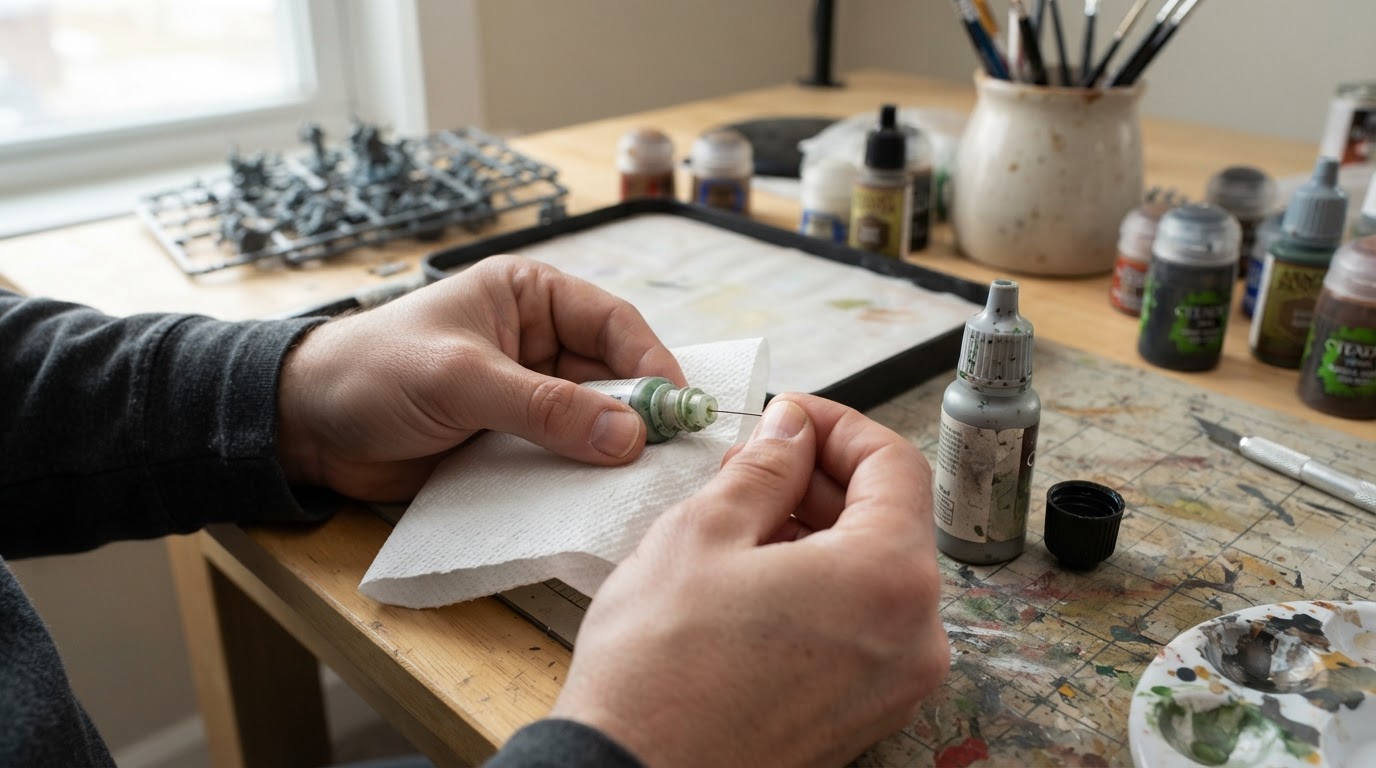
Vutpakdi calls clog clearing routine: "Clearing the clog is very easy but does require something like a pin, needle, or even a staple." He names a tool but describes neither the pressure used nor the injury reported in the thread above, which is why the handling here stays lighter and slower than his one-line description suggests.
Replace a damaged tip, or one that cannot be cleared without force
Replace the tip if it is cracked, split or deformed, and replace it if the plug will not clear without force. Those are the two conditions worth acting on; how many attempts you made before stopping is not a useful test of whether the part is still serviceable.
Vutpakdi's list notes that Reaper sells empty MSP dropper bottles. If you go that route, check that the replacement fits the neck of your bottle before buying more than one.
If the tip is clear, seated and dry, and the bottle still resists, inspect the neck and the contents and follow the paint manufacturer's guidance for that product. Symptoms alone do not tell you which of those is responsible.
A thinner question is separate from a local obstruction. Do not add cleaner or household solvent to a bottle to dissolve a plug at the tip: you cannot see how much went in, and the bottle no longer matches the paint you have been using. Thinning paint properly is its own task, done to the product's own instructions.